Wednesday, May 20, 2015

Custom Teddy and Bunny

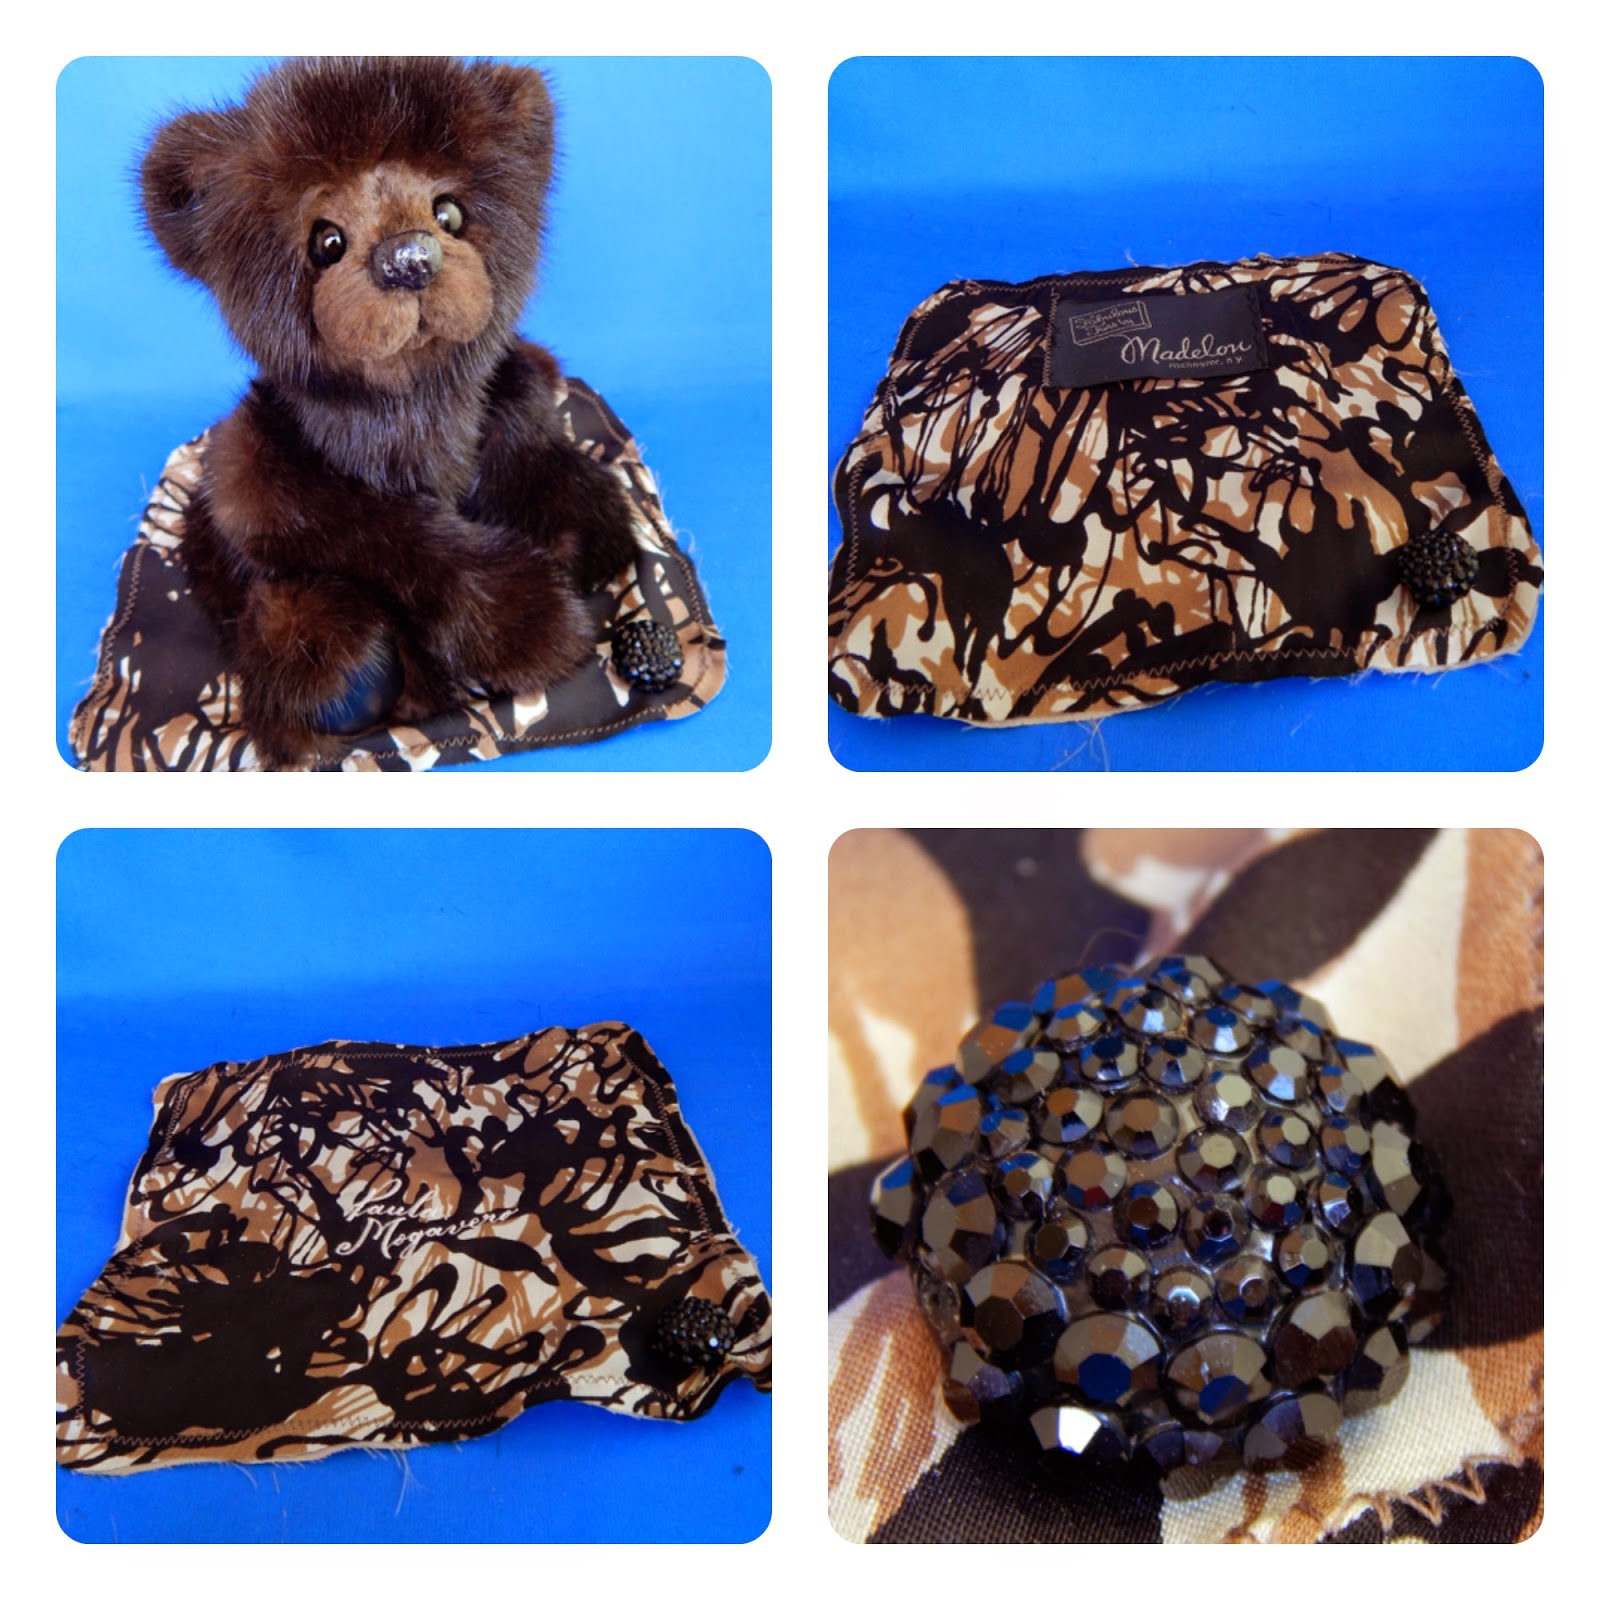
Penni's custom pair ... found "hiding" in her mother's mink stole


I guess I lied about "retiring" my bunny pattern because here it is again...
I think it was just on a brief hiatus, this pattern is just to good (and popular) to put away


Features of the "Mother" teddy pattern:
~ Hand-stitched vintage mink ~
~ Mother bear stands 12 inches tall ~
~ Interior is lined for extra durability ~
~ Glass eyes ~
~ Gently hand-painted details ~
~ Embroidered, waxed and sealed nose ~
~ Wire armature in arms and legs for gentle posing ~
~ 6 joints including a double jointed neck which allows for an adorable head tilt ~
~ Paw pads from the stole's lining...including "Brena" ~

Features of "Sweet Little Bunny" pattern:
From nose to tail they measure 6 inches long
From front feet to top of head they measure 4 inches high
Ears measure 3 inches
I used the garment lining for the paw pads and ear lining
Glass eyes
Gently hand painted details
Wire lining in ears
Double jointed neck
Unique jointed ears that allow for many different ear positions


Wednesday, April 22, 2015

Custom Teddy ...

#3615 for Jan


Trapunto paw pads were requested for this teddy
Please note: this is a special request
that adds to the time and cost of each custom teddy.
So if you are sending me your family mink stole to be
transformed into a teddy bear my standard paw is created from 
the stole or jacket lining and this trapunto paw pad is an upgrade.

CLICK HERE to see this teddy's creation

CLICK HERE to see the details of this teddy since
it is the same pattern as the first teddy that I created using these same minks.

Monday, April 13, 2015

Another Custom Teddy ...

from the unusual geometric patterned mink ...

To try to satisfy the following request:

"When you make this next bear, hopefully there won't be a light spot in between the legs. 
Please check for that before you cut if you can.  Thanks."

I laid out the pattern with the bottom front of the teddy in the dark triangle of mink and also following the correct direction of the (downward) hair growth ... 


... this will be the pattern on the front of the teddy body:


Another request was for Trapunto Paw Pads on this teddy. 
For anyone that is considering having me make them Custom Teddies from their mink please be aware that the standard paws for my Custom Teddy is to use the lining from the mink garment for a basic paw pad.
A Trapunto Paw Pad, while not difficult, is very time consuming because there is a lot of extra hand-sewing because each toe is outlined in tiny hand sewn stitches and then each toe is individually stuffed for a 3-D effect. So doing this for each of the 4 paw pads can add several hours on to the construction time ... so there is an extra charge for this style of paw pad.


The basic head has been completed ... just needs ears and final detailing.


Thursday, April 2, 2015

Five Custom Teddy Bears


Features of the "Mother" teddy pattern:
~ Hand-stitched vintage mink ~
~ Mother bear stands 12 inches tall ~
~ Interior is lined for extra durability ~
~ Glass eyes ~
~ Gently hand-painted details ~
~ Embroidered, waxed and sealed nose ~
~ Wire armature in arms and legs for gentle posing ~
~ 6 joints including a double jointed neck which allows for an adorable head tilt ~
~ Paw pads from the black leather belt ~
~ Includes a bonus: a mat for each of the teddies to sit on that was created from the lining ~

Each teddy will have a mat created from the coat lining. 
Each mat will have one of the beautiful coat buttons 
sewn on the corner.

To see photo journey of the creation of these teddies please CLICK HERE

I'm delighted to say that Carla was very happy with her family of teddy bears and sent me this lovely email when she received her box of bears:

Hi Kathy
I just received the bears. I’ve only opened one so far….
It brought tears to my eyes. It is absolutely adorable.
So beautiful!!!!!! The memories will continue….
The detail, the expression….
Thank you soooo very much!!!
Carla

Wednesday, February 25, 2015

Paula's Custom Order

This will be another photo journey of my creation of a 5 bear custom order.


Paula's Mink Coat
I love it when a little of the coat's history is shared with me. Paula's daughter, Carla, included a lovely note with the coat where she told me a little about the coat: "It was purchased in the late 70s. The year my dad got his pool table and she got to get her mink coat. This coat means a lot to her as they were born in the Depression era so this was a big deal to be able to afford it. She is excited to be doing this."

Well, Paula and Carla, thank you for trusting me with your beautiful family heirloom mink coat. The plan is to transform it into 5 teddy bears for the grandchildren. I will do my very best. I thought it would be fun to take you along on the Transformation Journey, so I will post photos along the way:

This is the coat ... very pretty mink. Dark brown mink does not photograph very well but it is beautiful in person. I can guarantee that the finished teddies will be pretty in my photographs but elegant and beautiful in person.

I LOVE these buttons ... I will use them somehow with the teddies.
This is the pattern that I will be using (my "Mother" bear pattern). The mink used in this example is very similar to the mink in Paula's coat ... so the teddies should look very similar.

The coat lining is so much fun! I'm thinking using it for little quilts for the teddies to sit on (one with the monogramed name and another with the label)
 I usually use the lining for the paw pads but included with the coat were two belts, one leather and one suede ... which will be great for the paw pads.

Next step?  Taking the coat apart ...


Taking a mink coat apart is very messy but it was another beautiful sunny day here in Southern California so I was able to work in my back yard. I like to let bits of fur and thread fly around the yard because I have seen birds pick them up for their nests.


It takes takes some time to cut out all the lining and to carefully trim and cut the coat into workable pieces.

Next step? 
 Cutting out the pattern lining and attaching to pelts ...


It was close but there was enough of the wider pelts for all five teddies.

Next step? Cutting out the pattern pieces and trimming them...
This is one of the most time consuming steps since there are 30 pattern pieces for each teddy bear, so with 5 teddies I need to cut and trim 150 pattern pieces ! Well, I know what I will be doing for the next couple of days. When I have a big order like this I tend to put on some Classic Fred Astaire or Gene Kelly movies because I've seen them so many times I know them by heart ... so I can cut and trim my pattern pieces without having actually look at the movie because I have all their dancing memorized.

Update Feb 27, 2015
It has been a couple of days and I am still cutting out the pattern pieces ... then I have to trim 1/8 inch of fur around the edges of each and every pattern piece to prepare it for sewing. This is going to take some time...
Update March 6, 2015
All 150 pattern pieces have been cut and trimmed... finally!
Next step? Sewing ... 
Fortunately since this is one of my larger teddies I will be able to sew the larger pieces together by machine which will not only save me time but also lots of stress on my hands. As you can imagine, after over 25 years of hand-sewing leather, my hands and fingers have suffered. I do insist on always sewing the bear's heads by hand because hand-sewing just allows for much better control and minor adjustments while sewing.

Update March 16, 2015
I'm a little over half way finished with all of the sewing and 
I've started to stuff the limbs and head.

Next step? Detailing the head
I will next work on the head, which is the most important part of the teddy. I will do some basic trimming and then install the eyes and embroider the nose.
Update: March 26, 2015 ... just a two more steps and the teddies will be (finally) finished!

Next step? Assemble the teddy


Final step? Attach the ears 
and finish the detailing on the face


Finally Finished!